Assuming you’ve familiarized yourself with the initial setup steps outlined in the preceding guides
- Guide 1: A Comprehensive Approach to Trading Solana Meme Coins
- Guide 2: Fine-Tuning Your Solana Trading Bot Configuration
let’s delve into the process of executing your maiden trade. Begin by launching your SolTradingBot on Telegram and typing “/start” to initiate the trade setup process.
Getting Started:
To kick off your trading journey, navigate to your SolTradingBot within Telegram and initiate the process by typing “/start” into the chat interface.
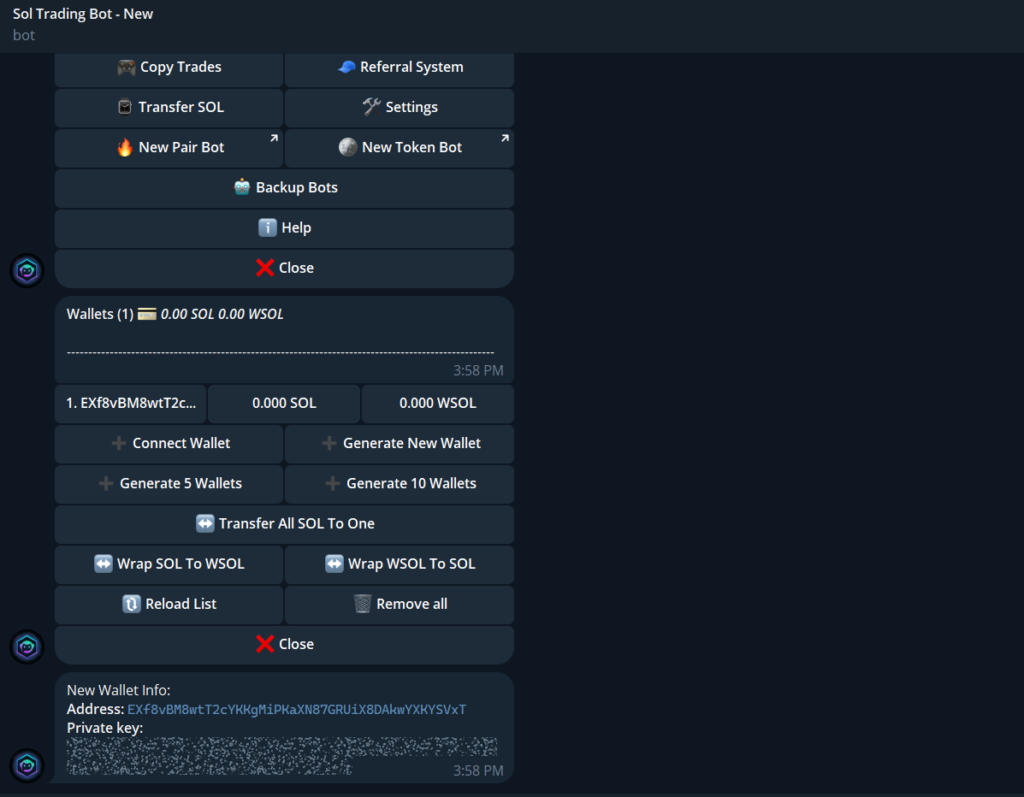
Generating a New Wallet: If you’re starting fresh, opt to create a new wallet by selecting “Generate New Wallet.” This action will yield two crucial components:
– Address: This serves as your wallet’s unique identifier, utilized for sending Solana and conducting trades via the bot.
– Private Key: Guard this key with utmost confidentiality, as it enables connection to external wallets such as Phantom Wallet or Solflare. Utilize both the address and private key to seamlessly transfer Solana between accounts.
Note: Sharing your private key compromises the security of your account.
Funding Your Wallet:
Once you’ve acquired the new wallet address, proceed to transfer a portion of Solana to this wallet. This wallet will serve as the primary account for trading activities. Alternatively, you can connect your existing Solana wallet to the bot using the “Connect Wallet” feature. However, maintaining separation between personal and trading wallets is recommended for enhanced security.
Executing Trades:
With your wallet set up and funded, you’re now ready to initiate trades. Simply paste the token contract into the chat interface and follow the prompts to buy or sell tokens. For a comprehensive demonstration of the process, refer to the short demo provided below. Additionally, ensure you’ve completed any initial setup steps outlined in the earlier guides to avoid oversights.
Leave a Reply